autoaudiorec - Autmatic saving audio recorder
Short introduction
This program helps you to generate a sequence of audio files for video dubbing, rehearsals, audio learnings, and music samples. The filename creation of the audio files is based on a sequential number or the current time and date (or a combination of both). You only have to press the record button for new audio recordings, or the play button to check on the last recording. With the delete button, you can redo your last recording.
User manual
The usage of this product is explained with the following video dubbing use case.
You crated a video of your holidays. For each day, you arranged the scenes. For each day, you wrote a script with several dialogues for your voice-over work. You connected your microphone and your headphone to your computer.
1. Prepare your headphone and microphone
There is no device selection or volume adjustment in our program. If you have multiple devices, you have to select the desired headphone and microphone as your default device.
Next, adjust the recording level of your microphone in Windows system setting. Right click on microphone symbol (1), select "Sound Settings" (2). In Settings dialogue choose the mic device (here Microphone) see (3). Check the recording level with the test button (5) of system settings. The Input volume (4) should be below 100%.

2. Prepare the program
Before you can start to record, you must set up the program properly.
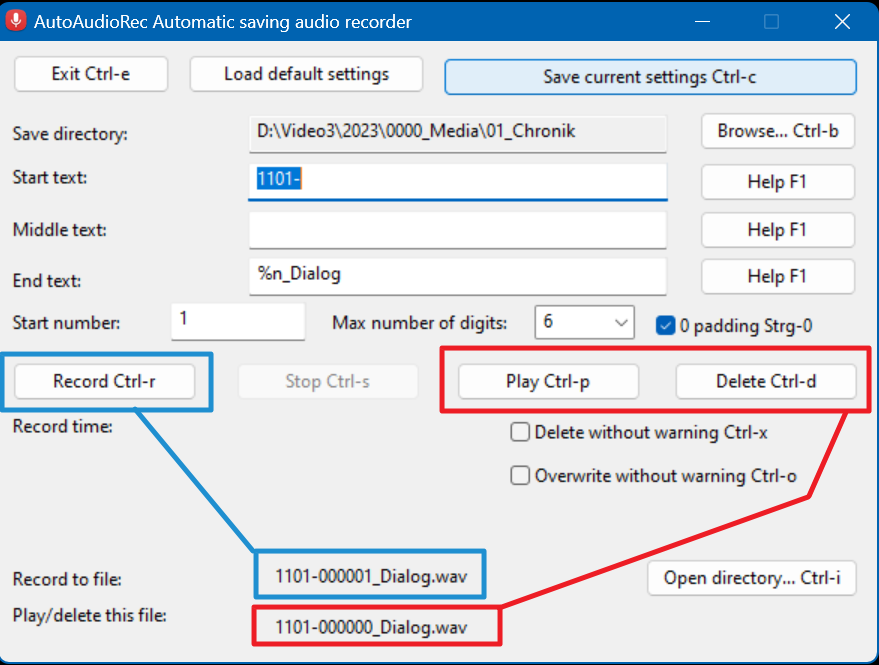
- First select the "Save directory:" - the location where you want to save the generated wave files. Press the button, "Browse... Ctrl-b" at the right. A directory selection dialogue will be shown there you can select the recording destination. Here we choose D:\Video3\2023\0000_Media\01_Chronik.
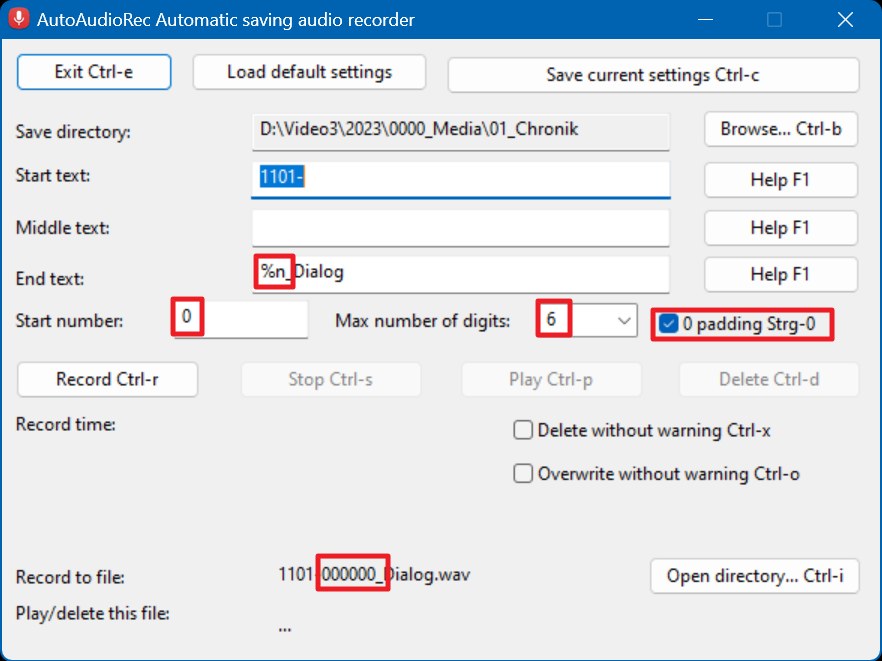
- Next we add the ruleset for the wave file generation. We want the wave file sequence number to start from 0 (Start number:). They should be left padded with up to 6 zero characters (Max number of digits) and [x] 0 padding Strg-0.
- In order to put everything together we have to fill the Start, Middle and End text. Start text: "1101-" means that the wave name starts with the date where the video sequence will be dubbed (11 is November and 1101- is first of November). End text: %n_Dialog means that a 6 digit long, zero padded sequence number is generated following by "_Dialog". %n is the placeholder for the automatic generated auto number sequence.
- The result can be seen below in Record to file: "1101-000000_Dialog". This means with each press of the record button, a new wave file is created. Each new recorded file has a filename where the sequence number (%n) is increased by one (1101-000000_Dialog.wav, 1101-000001_Dialog.wav, 1101-000002_Dialog.wav, ...).
If you are more interested in the current date and time of the recording, you can use all or parts of the current date and time as a filename sequence.
- Add the sequence number placeholder (%n) if the time and date part is not unique enough for the generated filename.
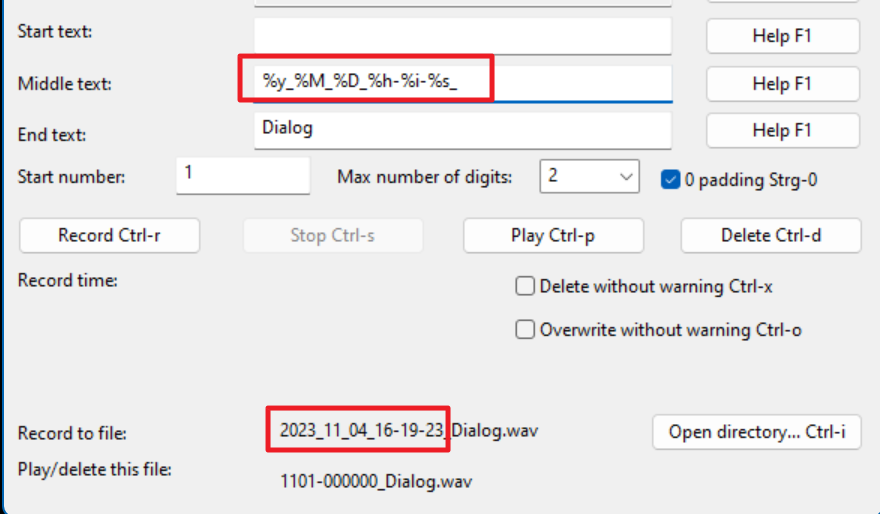
- Use one or more date and time placeholder in the Start, Middle or End text: fields. In this example, all placeholder of the current date and time are used (see Middle text:). %y is the year in 4 digits. %M is the month (1…12). The uppercase %M means left padded with zero, lowercase %m is not padded. %D is the day, %h the hour, %i minute and %s the current second.
- You will see the result in "Record to file:" - here we can see 2023_11_04_16-19-23_Dialog.wav. If you want to now move about the placeholder you can use - please use the F1 key or press the Help button.

3. Start the recording
After the preparation, you only have to do the recording. In order to check your recording and correct it, you have two additional buttons, Play and Delete, to play and/or delete your last recording.
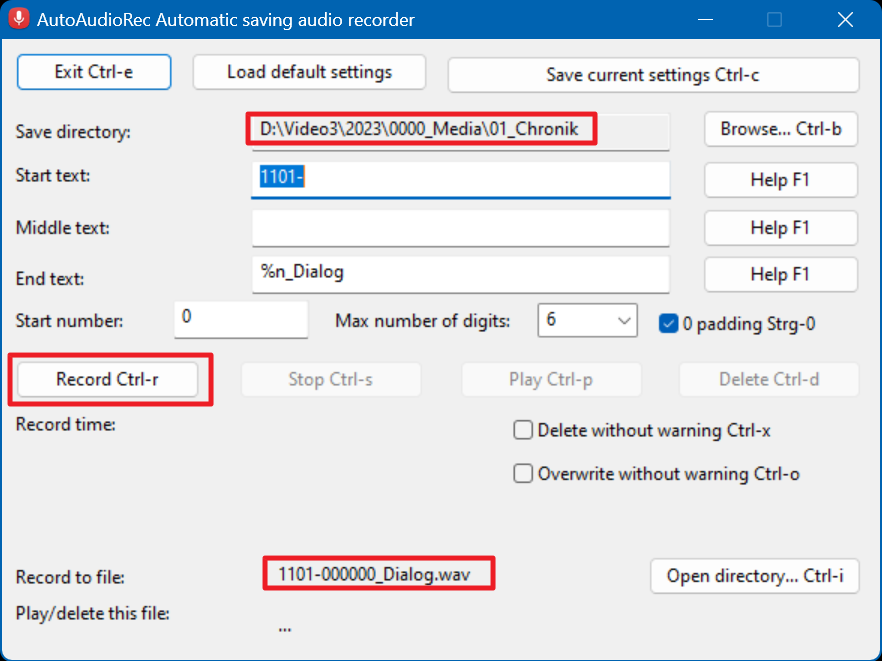
- After the startup of the program, only the "Record Ctrl-r" button is enabled. The directory and the filename will be shown in "Save directory:" and "Record to file:".
- If you want to check the directory, please use the "Open directory..." button. An explorer will open and show the content of the directory shown on the left of "Save directory:".
- Start the audio recording with the key Ctrl-r or press the "Record" button.
3.1 During recording
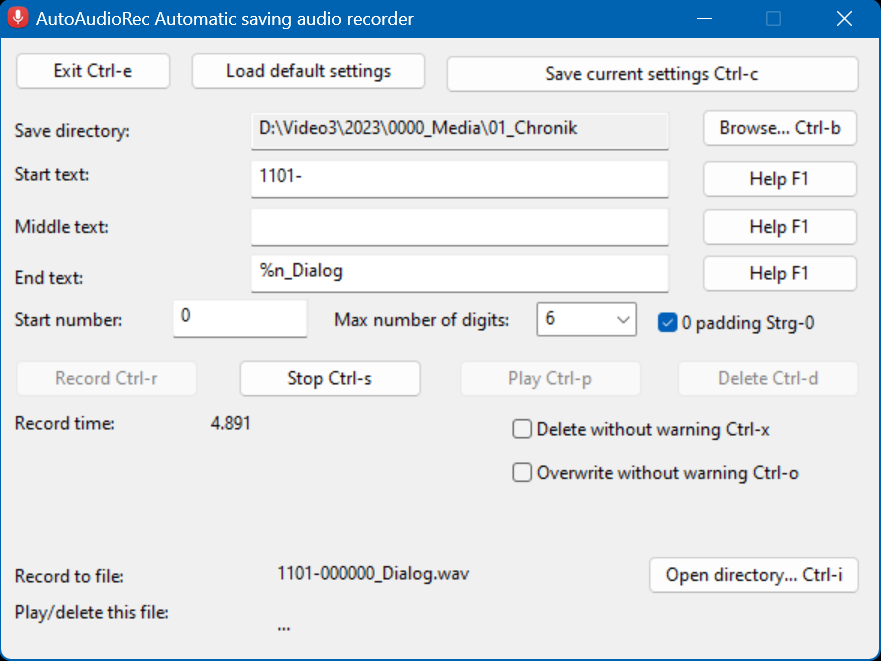
- During recording, the "Record time" shows the duration of your recording.
- During recording, you can only press the Ctrl-s key or the "Stop" button in order to stop recording.
3.2 After recording
- The last file that was recorded will appear to the left of "Play/delete this file:" after recording.
- You can use the "Play" button or the Ctrl-p key to play this file.
- You can use the "Delete" button or the Ctrl-d key to remove this file. The previous filename will be used in the new recording if you delete the file.
- The filename that follows will appear next to "Record to file:". This file will be created during the next audio recording.
- Pressing the "Record" button or the Ctrl-r key will allow you to record the following audio.
3.3 Speed up recording and deltion
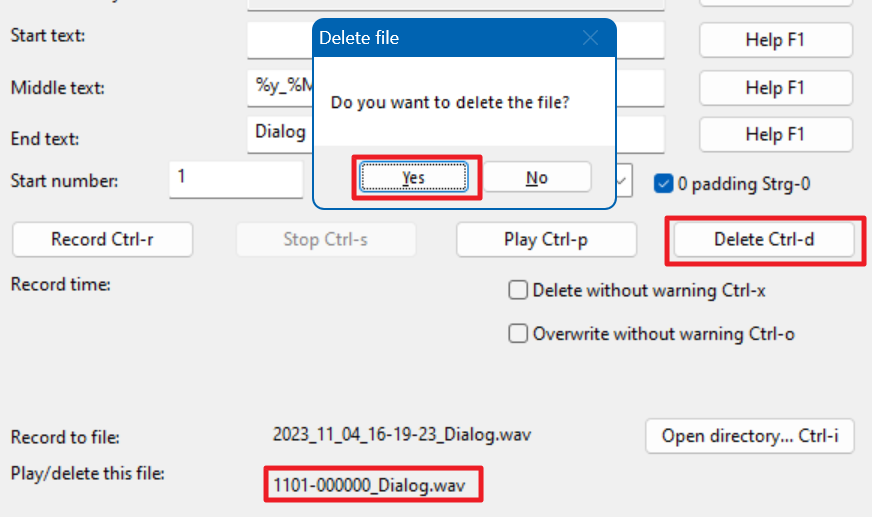
1.You can disable the warning messages if you don't want to see the warning shown below every time you overwrite or delete a recorded file.
2. Select "Delete without warning" or press Ctrl-x to avoid the "Do you want to delete this file?" prompt.
3. Select "Overwrite without warning" or press Ctrl-o if you don't want to be prompted with "Do you want to overwrite this file?" every time you replace an old recording.
4 Save your last configuration
If you want to reuse your settings each time you launch the app, you can save them permanently.
- After you've entered your preferred options, press Ctrl-c or click the "Save current settings" button to save them.
- To return to the last saved settings, simply press the "Load defaut settings" button or restart the software.

Images needed for documentation